Prerequisites
To install Snowcloak, you need to set some stuff up first.
Repositories
Snowcloak relies on a minimum of two third-party plugins to operate - Penumbra and Glamourer. These plugins are not officially endorsed by the Dalamud team, and so require the addition of a third party repository to install:
https://raw.githubusercontent.com/Ottermandias/SeaOfStars/main/repo.json
Additionally, you'll need to add Snowcloak's repository.
https://git.snowcloak-sync.com/repo.json
https://raw.githubusercontent.com/Eauldane/ElfShelf/main/repo.json
We have two repositories to make sure there's a backup - both will always have the most up-to-date version. The one on our domain is the preferred one, but you can use either.
To add these repositories, open Dalamud's Settings - either on the main menu, or by typing /xlplugins in chat if
you're in game and pressing the Settings button. Then, switch to the Experimental tab and scroll down to Custom Plugin Repositories.
Read and accept the warning - this warning applies to all plugins from third party repositories.
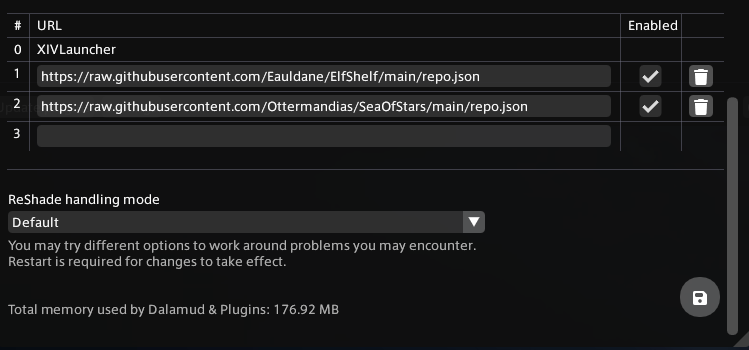
After each repository, press the plus button so that it's added, then the save button in the bottom right corner of the window.
Installing the mods
Use the search bar to install Snowcloak, Glamourer, and Penumbra.
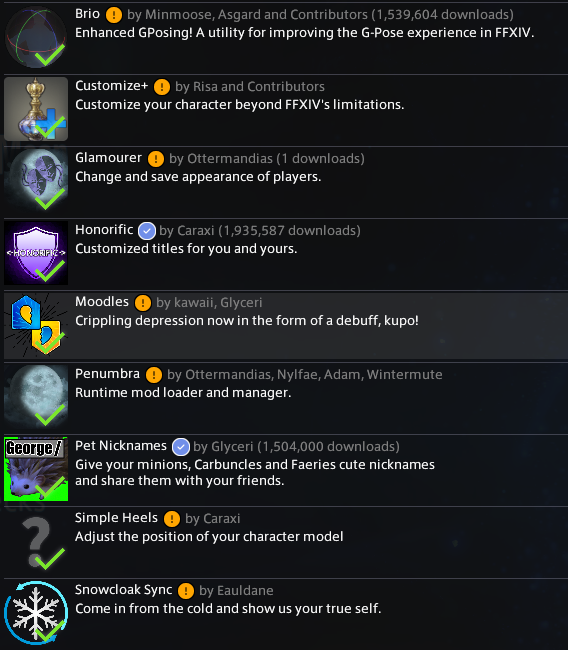
Optional mods that add functionality to Snowcloak that can also be installed at this stage, in no particular order, include:
- Brio
- PetNicknames
- Moodles
- Customize+
- SimpleHeels
- Honorific
If you install them all, your plugin list should look like this.
Configuring Penumbra
The last step before starting on Snowcloak is setting up Penumbra. In the plugin list, click Penumbra, then the Open button. A tutorial will start, guiding you through setup.
For both Snowcloak and Penumbra, a directory in your drive root is recommended. It's also a good idea to put it on an SSD for maximum performance.